I recently wrote a post on how to get Docker up and running on Rackspace and since then I have received some requests on how to get it up and running on other hosts. One of those hosts is Digital Ocean a hot new Cloud hosting provider that offers a 512MB 20GB SSD VPS for only \$5.00 / month. A really great deal, and also a great price if you want to play around with some new tool and not have to worry about possibly breaking a production server. This post should guide you though the process of getting an Ubuntu 12.04 and 13.04 VPS up and running with Docker.
Step 1: Register
First things first, if you don’t already have a Digital Ocean account, you will need to create one. If you follow this link, click sign up and enter this promo code VPSERS10, you will be given a $10 credit to try out the service.
Step 2: Billing
To prevent abuse, Digital Ocean requires that you enter a credit card before you can spin up a server. Go ahead and do that now. Once you put in your information you should see a screen like this.
Step 3 SSH keys
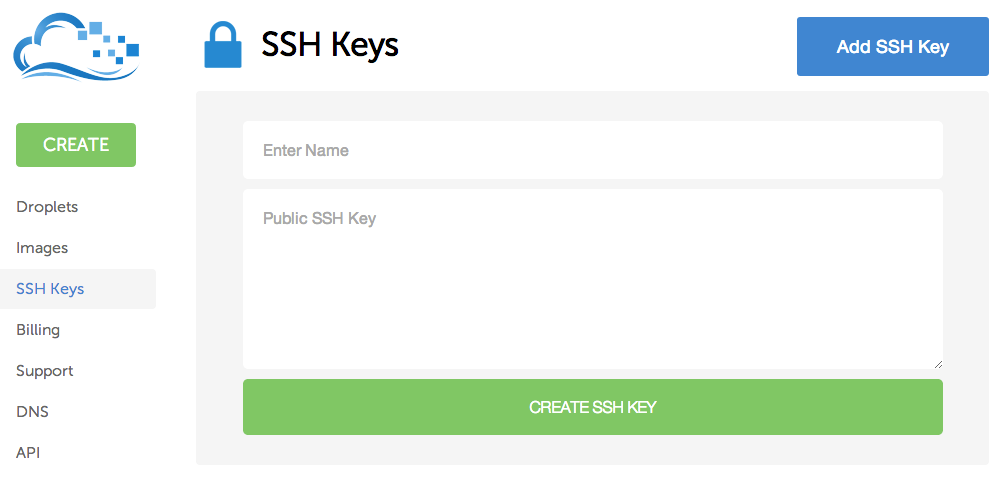
To make your life easier, I would add a public SSH key to your account. If you don’t add an SSH key then you will be emailed a root password when the server is setup. It is easier and more secure to add your public key, and then select that key when building the server, and they will automatically add the key to your server for you. If you don’t have a SSH key, don’t worry they are easy to create. Just do a quick web search, and there are a ton of different guide out there to help you get one setup.
Step 4: Create Droplet
Digital Ocean calls their servers Droplets. Lets create a droplet. Click on the big “Create” button on the control panel.
- Enter a hostname at the top.
- Pick your size
- select your region
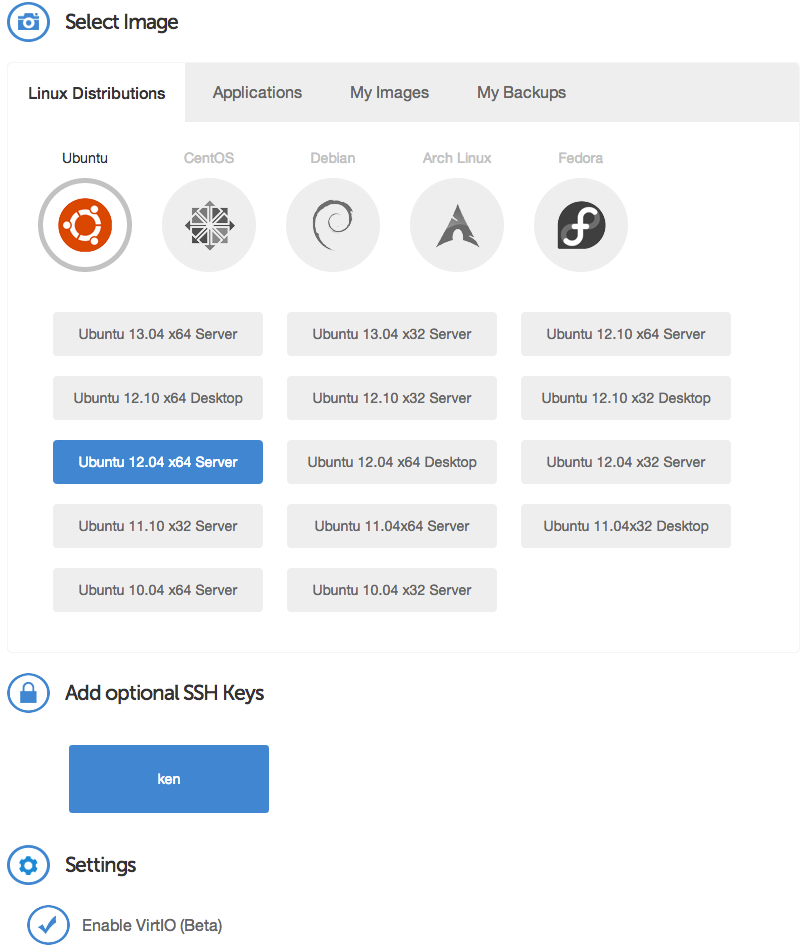
- Select your image. Docker currently only runs on a 64bit OS, and needs a fairly recent kernel (3.8+) with AUFS enabled. The only images on Digital Ocean that will currently work with Docker are Ubuntu 13.04 x64 Server, and Ubuntu 12.04 x64 Server. I’ll cover the install instructions for those two options below.
- Pick your SSH key that you added previously. If you don’t pick one, your root password will be emailed to you.
- Enable VirtIO
- Click the big “Create Droplet” button at the bottom.
Droplet getting created
After about 60 seconds you should have a cloudlet created with an IP address. Now pick the distribution you picked below and follow the rest of the directions.
Ubuntu 12.04 64bit Server
Upgrade kernel
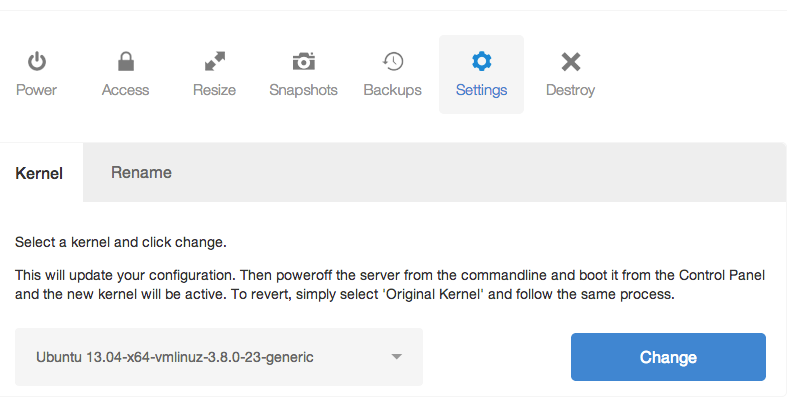
The default kernel with 12.04 doesn’t work well with Docker so we are going to upgrade to the same one that is used by 13.04. To do this you will go into your control panel for your droplet, and go into the settings tab and change the kernel pull down to “Ubuntu 13.04-x64-vmlinuz-3.8.0-23-generic” and click change.
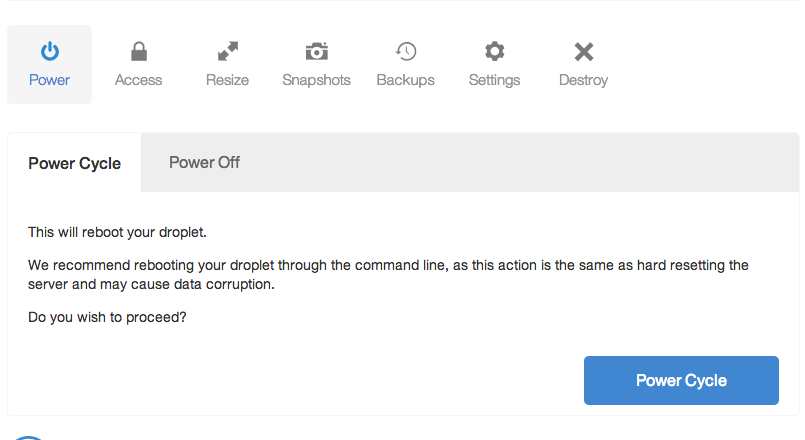
In order for the kernel change to take affect you will need to power cycle the droplet. Click on the power tab, and then hit the “Power Cycle” button.
Login to server
Now that you have the new kernel you need to login to the server to install the rest of the stuff.
$ ssh root@<your_ip_address>
Let’s check to make sure you have the right kernel. It should show a 3.8 kernel if you did everything right.
$ uname -a
Linux docker-1 3.8.0-23-generic #34-Ubuntu SMP Wed May 29 20:22:58 UTC 2013 x86_64 x86_64 x86_64 GNU/Linux
Let’s install some dependencies now.
$ sudo apt-get update && sudo apt-get install linux-image-generic-lts-raring
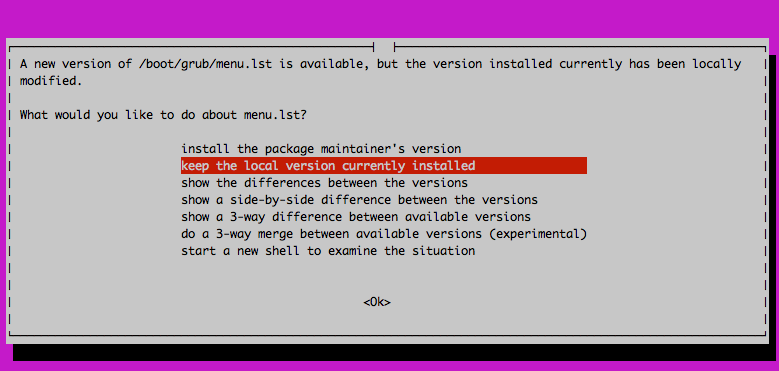
If you see this, just pick the default (already selected) and hit OK.
Install Docker from the Docker PPA
$ sudo apt-get install python-software-properties && sudo add-apt-repository ppa:dotcloud/lxc-docker
$ sudo apt-get update
$ sudo apt-get install lxc-docker
Docker should have been installed and started up. lets test to make sure it works.
``` {.sourceCode .bash docker version Client version: 0.4.0 Server version: 0.4.0 Go version: go1.0.3
$ docker run base /bin/echo hello world hello world
Hopefully it worked. If not, feel free to ask questions on \#docker on
freenode, or [submit a support
ticket](https://github.com/docker/docker/issues?labels=doc&state=open).

Ubuntu 13.04 64bit Server
=========================

13.04 comes with the 3.8 kernel, so we won't need to do anything kernel
related, which makes this install much simpler compared to 12.04.

Install the dependencies

``` {.sourceCode .bash}
$ sudo apt-get update
$ sudo apt-get install linux-image-extra-`uname -r`
If you see this, just pick the default (already selected) and hit OK.
Install Docker
$ sudo apt-get install software-properties-common
$ sudo add-apt-repository ppa:dotcloud/lxc-docker
$ sudo apt-get update
$ sudo apt-get install lxc-docker
Docker should have been installed and started up. lets test to make sure it works.
$ docker ps
ID                  IMAGE               COMMAND             CREATED             STATUS              PORTS

$ docker version
Client version: 0.4.0
Server version: 0.4.0
Go version: go1.0.3

$ docker run base /bin/echo hello world
hello world
Hopefully it worked. If not, feel free to ask questions on #docker on freenode, or submit a support ticket.
Conclusion
Hopefully now you have the knowledge to go and setup your own Docker server on Digital Ocean. If you have any issues, or questions feel free to submit the questions below or visit #docker on freenode

